
Strength training for climbers is about building the physical qualities you need to excel in climbing: strength, endurance, power, and injury resistance.
Unlike a bodybuilder who focuses on growing big muscles, your aim is to build maximum strength and muscle endurance to help you move efficiently on the wall or rock, hold tough positions, and stay injury-free.
In this article, you’ll learn why hitting the weights will not only make you a better climber but also help with injury prevention and even confidence. In addition, you get a complete 14-week strength training program that will improve your climbing performance by making you stronger and more powerful.
Why Strength Training Matters for Climbers
Strength, Power, and Force
Climbing is a demanding sport that requires full-body coordination, balance, and strength. Climbing itself makes you stronger, but not like resistance training can.
In any physically demanding sport, the top guys don’t just do sport-specific training. Weight training is an essential part of any strategy to become a better athlete, and that includes climbing.
A climbing newbie will quickly improve just by climbing, but as you get more advanced, you must be able to generate a lot of force to perform your climbing moves as efficiently as possible. Stronger muscles allow climbers to make more explosive movements, like dynamic pulls and locking off holds, making complex moves easier.
And there is no better way to improve your force capacity than to lift heavy iron.
Injury Prevention
Adding strength training can also help prevent injuries. Climbing has the highest injury rate of any Olympic sport, almost twice that of other sports.1 And what’s the best way to reduce sports injuries? You guessed it: lifting weights. Strength training can reduce sports injuries to one-third and overuse injuries by almost half.2
Climbing puts a ton of stress on tendons and ligaments, especially in the fingers and forearms. Heavy strength training can increase the structural strength of connective tissue, preparing your body for the stress it’s under on the wall or rock.
In addition, climbers often overuse certain muscles (like the forearms and shoulders), and a well-designed strength training program helps correct imbalances between muscle groups that oppose each other.3
Many athletes use strength training for rehab and come back from injuries. However, even better, strength training is like a preemptive strike on injuries. By strengthening weak links and preparing your body for the unique loads climbing involves, you can prevent issues before they even start.
Improving Your Climbing
Because both general and climbing-specific strength are of such great importance to climbing performance, it only makes sense that improving your strength beyond what climbing itself can do will make you a better climber.
For example, one study found that climbers who combined strength training with climbing improved their climbing performance by about 11–12% despite cutting their climbing sessions.4 The control group, which continued climbing as usual but without added weightlifting, showed only a 4.5% improvement.
Stronger muscles mean you’ll be able to handle the physical demands of climbing, improve grip strength, and endure long climbing routes without fatiguing as quickly. You’ll require less effort to complete moves and improve your efficiency and stamina on longer routes. In addition, if you strengthen the muscles you use in climbing, you’ll boost your ability to perform challenging moves and maintain better form during climbs.
And even when you reduce your actual climbing practice (like during the off-season), you can still keep improving your climbing performance if you incorporate a few gym sessions per week.
Key Areas to Focus On
Strength training for climbing should focus on movement patterns that replicate the demands of climbing. Training movement patterns your body naturally uses makes your strength workouts more transferable to climbing.
Most of your lifting should work your muscles together in coordinated patterns rather than isolating individual muscles. You develop neuromuscular coordination, where muscles fire in the correct sequence and timing to execute complex movements more efficiently.
Training movement patterns often involve compound exercises that work several muscle groups at once (e.g., deadlifts, squats, pull-ups). They make your workout more time-efficient, allowing you to train more muscles in less time and spend more time and energy on actually climbing.
Upper-Body Pulling Movements
- Vertical Pulls: Climbing relies on pulling strength in vertical or near-vertical routes. The best exercises for improving vertical pulling strength are pull-ups and lat pulldowns that work the latissimus dorsi, biceps, and upper back.
- Horizontal Pulls: Exercises like inverted rows and bent-over rows strengthen the upper back, traps, and rear delts, improving posture and scapular control, which are crucial for maintaining body tension on the wall.
Lower Body Pushing Movements
- Squats: Many people believe climbing is mostly hands, shoulders, and back, and while they are correct to a certain degree, climbing also involves a lot of pushing through the legs in dynamic movements or when standing up from deep positions. Squats (back, front, goblet, or pistol squats) strengthen the quads, glutes, and adductors for these motions.
- Step-Ups: Mimicking high-steps or mantling on the wall, step-ups train the ability to push off one leg while stabilizing the rest of the body.
- Lunges and Split Squats: Unilateral exercises train single-leg strength and stability, which help maintain balance and generate force from awkward or unbalanced positions.
Lower Body Pulling Movements
- Hip Hinges: Climbing often requires hinging at the hips for body positioning. Deadlifts and Romanian deadlifts build strength in the posterior chain, including the hamstrings, glutes, and lower back, improving your ability to maintain body control and tension.
Grip Strength
- Finger Hangs: Building finger strength is critical for holding onto small holds. Training on a hangboard or doing weighted hangs targets your finger flexors directly.
- Pinch Grip and Crimping: Exercises that simulate different grip types, like pinch block lifts and crimp holds, build specific grip strength needed for various climbing holds.
Core Strength
- Anti-Rotation and Anti-Extension: Climbing requires plenty of core stability for body tension and control. Planks, hollow body holds, L-sit holds, and dead bugs strengthen the core while minimizing movement.
- Rotation: Movements like core twists or woodchoppers improve rotational strength, which is essential for twisting the body and maintaining balance on the wall.
Shoulder Stability and Mobility
- Overhead Presses: Shoulder pressing movements like overhead presses, dumbbell shoulder presses, or push presses help build overhead stability and shoulder strength.
- Bench Presses: Dumbbell chest presses and barbell bench presses strengthen the pecs and triceps, which are important for stabilizing the body and pushing your body upwards. In addition, stronger triceps help balance the biceps, which you use a lot when you climb and can get overused and overdeveloped in comparison.
Isometric Holds
- Climbing involves maintaining static positions. Isometric holds (e.g., wall sits, front lever progressions, or isometric pull-up holds) build strength and endurance in the muscles required to hold positions without movement.
Focus on Compund Movements That Give You the Most Bang for Your Buck
Your two most valuable training resources are time and recovery ability, and if you spend too much time in the weight room training like a powerlifter or bodybuilder, you deplete those resources. There are only so many hours to train and recover from that training in a day or week.
Focusing on compound movements that replicate movement patterns used in climbing is a great idea. These exercises build strength, coordination, and body control while allowing you to conserve energy and time for actual climbing practice.
Compound movements are exercises that work several muscle groups and joints. Think pull-ups, deadlifts, rows, and squats. They all work multiple muscle groups in a single movement and improve strength in key areas like your grip, core, back, and legs, all of which are crucial for your climbing performance.
By focusing on these functional movements in your strength training, you target the muscles and movement patterns that directly boost your climbing without overloading your body with unnecessary volume.
This way, you have more time and energy left for climbing-specific training. A low-volume, high-intensity approach to strength training, with compound exercises as the centerpiece, maximizes your efficiency in the gym and helps you develop the strength you need to support your climbing without burning out.
Strength Training Principles for Climbing
To build the kind of strength that translates to climbing, you’ll want to follow these principles:
Low-Volume, High-Intensity
Instead of doing a ton of reps, focus on fewer reps with heavier weights.1 This is important because climbing often involves powerful, single moves rather than repetitive motions against a light resistance.
Some moderate-to-high-rep work is great, but it’s a good idea to spend the majority of your gym time lifting heavy things.
Progression and Overload
Like any sport, climbing strength should be built over time. If you are new to lifting weights, start with basic movements to develop foundational strength and then progress to more complex exercises that challenge balance, coordination, and climbing-specific muscles.
Also like any sport, progressive overload is key to gaining strength over time. You always have to challenge your muscles by trying to lift a little heavier or do one more rep than your last workout. The gains will come. Keep lifting the same weights and doing the same number of reps workout after workout, and your progress will soon stall.
However, overload without enough rest and recovery leads to overtraining.
Recovery and Adaptation
Gains don’t happen while you are training but during rest periods when your muscles adapt and grow stronger. For climbers, recovery is especially important because overtraining can lead to tendon issues, especially in the fingers and elbows.
It can be easy to want to do some form of training every day, but by incorporating rest days and active recovery, you allow adaptation to take place. Balance intensity with sufficient recovery to avoid injury and optimize strength development.
How Often Should Climbers Lift Weights?
For almost every climber, I’d recommend you hit the weights 2–3 times per week.
One session is usually insufficient for substantial strength gains unless you are completely new to training. Four sessions (or more) is too much; you take time away from climbing and risk overtraining. Even three weekly strength workouts can be too much for less advanced climbers and during in-season training.
A frequency of two, or a maximum of three, lifting sessions per week strikes a balance between providing enough stimulus for strength gains and allowing adequate recovery time and injury prevention. You build strength while still leaving room for climbing-specific training and recovery.
Adjust your training intensity and volume throughout the year.
- During off-season when you’re climbing less, you can increase the intensity and volume of your strength training to build a solid foundation.
- During in-season climbing, reduce the volume but maintain the intensity of your strength sessions to preserve your gains without risking overtraining.
- As you approach peak climbing periods, shift focus towards climbing-specific workouts and technique refinement while still doing some heavy strength work.
Two Times per Week (Minimum)
Lifting weights twice weekly is an ideal baseline for climbers focused on improving strength and climbing performance. A 2-day program should prioritize compound movements (like deadlifts, pull-ups, and squats) and climbing-specific exercises (like weighted hangs and fingerboard work). This setup allows for:
- Full-body strength gains
- Ample recovery for both resistance training and climbing sessions
- Flexibility to fit around a climbing schedule
Three Times per Week (For Advanced Climbers and Off-Season Training)
If you are more advanced or have the recovery ability to handle a higher workload (like during the off-season when climbing frequency is reduced), a 3-day per week resistance training program can be effective.
You would still focus on full-body workouts but can split them into different focuses (e.g., upper-body strength, lower-body power, and climbing-specific core work). It provides:
- More training volume for faster strength development
- Balanced programming with climbing-specific movements
- Careful attention to recovery, especially if climbing 2–3 times per week as well
Balance with Climbing Sessions
Schedule your resistance training on days when you’re not climbing intensely to avoid overworking the same muscle groups.
Make sure you have at least one rest day per week to allow your body to recover fully.
Strength Training Periodization for Climbers
Periodization is when you divide an extended training period (like a year) into phases or blocks, each with a specific focus.
Benefits of Periodization for Climbers
- By constantly changing the focus and intensity of your training, you can avoid stagnation and keep progressing.
- Properly structured training phases include recovery (like deload weeks) and adaptation, which prevent common overuse injuries in climbing.
- Periodization allows you to target your performance peaks, making sure you’re at your strongest and most capable before a competition or a challenging project.
Types of Periodization
Three of the most common types of periodization for climbers are linear, block, and undulating periodization.
Linear Periodization
Linear periodization involves gradually increasing training intensity while reducing volume over time. It’s often the best and most straightforward way for a beginner to periodize their training.
It’s a classic method of structuring your training for strength, power, and endurance. It works well for a climber and allows you to peak for a specific performance goal by systematically progressing through different phases of your training.
Block Periodization
Block periodization divides a longer training period into phases or “blocks,” each with a specific focus, like muscle growth, maximal strength, or power, while maintaining lower levels of other goals. Each block is more specialized and intense, with sharper transitions between phases compared to the smooth flow of linear periodization.
It’s one of the best approaches for climbers to develop different performance areas in sequence, maximizing gains and minimizing fatigue over time.
Example for a climber:
- Block 1 (4 weeks): Hypertrophy (higher volume, moderate intensity)
- Block 2 (4 weeks): Maximal strength (lower volume, higher intensity)
- Block 3 (4 weeks): Power/Performance (near-maximal loads and explosive movements)
Each block develops a foundation (hypertrophy), builds strength on that foundation, and then converts that strength into power and climbing-specific performance.
Undulating Periodization
This periodization model varies intensity and volume within shorter time frames, like weekly or even daily.
It can be useful for climbers who need to develop multiple fitness components (e.g., strength, power, and endurance) simultaneously but want to avoid burnout from focusing on one aspect for too long. However, it might lack the focused progression of block periodization and may not allow enough dedicated time for each component.
Example for a climber:
- Day 1 (Strength Focus): Heavy, low-rep, maximal effort
- Day 2 (Power Focus): Explosive, high-load, speed-oriented
- Day 3 (Endurance/Hypertrophy Focus): High-rep, moderate weight, time under tension
Phases of Periodization for Climbers
When applying periodization to climbing, the phases are typically broken down into the following:
Hypertrophy Phase
This phase focuses on increasing muscle size and endurance. While hypertrophy itself isn’t the primary goal for climbers (being massive like a bodybuilder would be a detriment), building some muscle mass creates a foundation for future strength gains. The size of a muscle is a huge part of how strong it is.
Higher volumes with moderate weights often characterize the hypertrophy phase.
- Goal: Increase muscle size and endurance for longer climbs.
- Training: 8–12 reps, 3–5 sets, moderate weight. Classic compound bodybuilding exercises like squats, pull-ups, and dips work great here.
Maximal Strength Phase
This phase focuses on increasing the maximum amount of force your muscles can produce. It helps climbers improve grip strength, pulling power, and the ability to handle more challenging holds.
- Goal: Improve maximal strength in climbing-relevant muscle groups.
- Training: 3–5 reps using heavy loads. Focus on exercises like weighted pull-ups, deadlifts, squats, and other compound lifts.
Power Phase
In the power phase, your goal is to convert the strength you have gained into explosive, fast-twitch muscle performance. You’ll benefit during dynamic moves like dynos or fast, powerful moves on the wall.
- Goal: Develop explosive strength for dynamic climbing moves.
- Training: 1–3 reps performed explosively. Exercises like plyometric pull-ups, cleans, and box jumps are great additions here.
Deload Weeks
An important part of periodization is the inclusion of deload weeks—periods where intensity and volume are significantly reduced.
These recovery periods allow your body to adapt and recover, reducing the risk of overtraining and injury.
Deloads might be especially important for climbers due to the stress on the tendons and ligaments from both climbing and resistance training.
During a deload week, reduce the weight you usually lift by 50–60%, reduce the number of sets, and focus on pumping some blood into the muscles rather than going all out in the gym.
Balance Strength Training and Climbing to Avoid Overtraining
Even though strength training improves climbing performance, the trick is to balance the two. Incorporating lifting while avoiding overtraining is the key to long-term progress and injury prevention.
Here are some strategies to help you pay attention to signs of overtraining, like persistent soreness or decreased performance:
Monitor Recovery
Pay attention to how long you are sore after a workout. It’s normal to feel sore for a day or two, but persistent soreness may be a sign that you’re doing too much for your body to recover from.
Track Your Performance
Keep a workout log of your climbing and strength sessions, focusing on performance markers like the number of reps, weight lifted, or climbing grades. If you notice a consistent drop in performance (e.g., feeling weaker or more fatigued), it may indicate overtraining.
Our workout log app, StrengthLog, has everything you need to keep track of your weight training, and it’s free to boot.
Evaluate Your Energy Levels
If you consistently feel drained or unmotivated to train or your energy levels during sessions are lower than usual, it could be a sign of central fatigue linked to overtraining.
Cut down on your strength training volume and intensity and prioritize rest and plenty of quality nutrition until you feel back on track, then gradually up the strength work again.
Resting Heart Rate (RHR)
Track your resting heart rate over time. An elevated RHR (especially in the morning) can indicate that your body isn’t recovering fully from your training.
Sleep Quality
Poor sleep or difficulty falling asleep is another common sign of overtraining. If you notice that your sleep has become more restless or you wake up tired, it may be time to adjust your training volume.
Use RPE (Rate of Perceived Exertion)
Rate your effort during both climbing and strength sessions. If a workout that usually feels like a 7/10 on the RPE scale now feels like a 9 or 10, that’s a red flag for overtraining.
Periodization
Don’t just blast max intensity year-round. Use a structured program that includes regular deload weeks and variety in intensity to allow your body to adapt and recover.
For example, a deload week, where you cut intensity and volume in half every 4–6 weeks, will help prevent burnout and promote recovery.
Strength Training Program for Climbers
This is a strength training program for intermediate-level climbers who want to get stronger to help improve climbing performance. You don’t need a climbing gym, as all exercise variations can be done with regular free weights and your body weight.
The program is 14 weeks long, split into three 4-week blocks divided by deload weeks, with a mix of compound exercises and climbing-specific exercises.
- Block number one focuses on foundational strength and hypertrophy (muscle growth). You will not get bodybuilder-bulky, but the size of a muscle is the number one factor that determines how strong it is, so some muscle gain is essential for the best results.
- In the second block, you increase the intensity (lift heavier weights) for maximum strength gains.
- The third block is all about boosting fast-twitch muscle performance and power output with near-maximum weights and explosive movements.
Each session is a full-body workout, except during the third block, which is an upper/lower split.
Strength Training for Climbers and many more programs are in the StrengthLog workout tracker app. The app is free to use, forever, with no ads. This program, however, is a premium program (it offers built-in progression and advanced periodization), which means it requires a premium subscription.
We offer all new users a free 14-day premium trial, which you can activate in the app without any strings attached.


Sample Weekly Schedule
You can pick which days you hit the weights to fit your schedule, but take at least one rest day between each strength training session.
Here’s an example of a training week for someone climbing three times weekly.
| Day | Activity |
|---|---|
| Monday | Climbing Session |
| Tuesday | Resistance Training |
| Wednesday | Rest or Light Cardio |
| Thursday | Climbing Session |
| Friday | Resistance Training |
| Saturday | Climbing Session |
| Sunday | Rest |
Block 1 (Weeks 1–4): Foundational Strength and Muscle Growth
Focus on building overall strength with moderate intensity and higher volume.
This block focuses on increasing muscle size (hypertrophy), which will lay the foundation for future max strength gains. Perform 8–12 repetitions (3–4 sets) per exercise, with around 70–80% of your one-rep max (1RM).
Workout 1:
- Fingerboard Dead Hangs (on medium to small holds): 4 sets x 20–30 seconds
- Weighted Pull-Ups: 4 sets x 8–10 reps
- Overhead Press (Dumbbell or Barbell): 4 sets x 8–10 reps
- Bulgarian Split Squats: 3 sets x 10 reps each leg
- Hanging Leg Raises: 3 sets x 12–15 reps
Workout 2:
- Deadlifts: 4 sets x 5–6 reps
- Inverted Rows (weighted if possible): 4 sets x 10 reps
- Dips: 3 sets x 10–12 reps
- Dumbbell Step-Ups: 3 sets x10–12 reps
- Plank: 3 sets x 60 seconds
Week 5: Deload Week
Reduce volume and intensity to allow for recovery and adaptation.
Workout 1:
- Fingerboard Dead Hangs: 3 sets of easy holds
- Pull-Ups : 2 sets x 5 reps
- Overhead Press: 2 sets x 6 reps (reduce weight by 50%)
- Hollow Hold: 3 sets of easy hollow holds
Workout 2:
- Front Squats: 2 sets x 8 reps (50% of 1RM)
- Romanian Deadlifts: 2 sets x 8 reps (light load)
- Hanging Knee Raises: 2 sets x 10 reps
Week 6–9: Maximal Strength Block
Focus on developing max strength and force production without increasing training volume significantly.
This block is all about developing maximal strength by reducing the rep range to 3–5 reps with heavier loads (85–95% 1RM).
Workout 1:
- Weighted Pull-Ups: 5 sets x 3–5 reps
- Fingerboard Hangs (add weight if needed): 5 sets x 6–15 seconds
- Overhead Press: 4 sets x 3–5 reps
- Front Squats: 4 sets x 3–5 reps
- L-Sit Hold: 4 sets x 20 seconds
Workout 2:
- Deadlifts: 5 sets x 3–5 reps
- Bench Press: 4 sets x 3–5 reps
- Dumbbell Rows: 4 sets x 4–6 reps
- Walking Lunges: 3 sets x 8 reps per leg (weighted if possible)
- Medicine Ball Slams: 4 sets x 12 reps
Week 10: Deload Week
Repeat a deload similar to Week 5 to allow full recovery and consolidation of gains.
Week 11–14: Power/Performance
An emphasis on near-maximal loads and explosive movements for improving fast-twitch muscle performance and power output.
This type of training translates directly to dynamic movements in climbing. The rep ranges are low (1–3 reps) to focus on maximal strength and explosive power. This part of the strength training for climbers program features one day of lower-body focus and one day of upper-body focus per week.
Workout 1:
- Trap Bar Deadlift: 4 sets x 2–3 reps
- Focus on explosive movement off the floor, moving the weight as quickly as possible while maintaining proper form.
- Box Jump: 4 sets x 3–5 reps
- Jump explosively onto a high box, focusing on maximum height.
- Bulgarian Split Squat: 3 sets x 2–3 reps
- Use near-maximal weight. Drive explosively from the bottom of the squat.
- Kettlebell Swing: 3 sets x 8–10 reps
- Focus on an explosive hip hinge and swing the kettlebell to chest height with maximal power.
Workout 2:
- Pull-Up: 4 sets x 1–3 reps
- Use enough weight to keep the reps low but still pull explosively.
- Push Press: 4 sets x 2–3 reps
- Start from the rack position and press the bar overhead explosively with a dip in the knees.
- Barbell Row: 3 sets x 2–3 reps
- Focus on explosively pulling the barbell towards the torso while maintaining control of the descent.
- Medicine Ball Slam: 3 sets x 6–8 reps
- Use a heavy medicine ball, and focus on slamming it to the ground as hard as possible.
Strength Training Exercises for Climbing
Here are detailed descriptions of all the exercises in the Strength Training for Climbers program in the order they appear.
Fingerboard Dead Hang

The fingerboard dead hang is an exercise used by climbers to improve finger strength and grip endurance. It involves hanging from a fingerboard (also known as a hangboard), a piece of equipment designed with various holds or pockets that simulate climbing holds.
This exercise is a killer for forearm strength and an essential part of a climber’s routine, but it should be approached with caution, especially if you’re new to fingerboarding, as it can put a lot of strain on the tendons. Gradually build up intensity to avoid injury.
How to Do Fingerboard Dead Hangs
- Stand before a fingerboard mounted at a height where you can comfortably reach the holds without jumping.
- Reach up and place your fingers on the chosen holds. Use an open-hand grip (fingers slightly bent with the load distributed across all fingers) or a half-crimp grip (first joint of the fingers bent at 90 degrees, thumb not wrapped over the index finger).
- Lift your feet off the ground so your entire body weight is supported by your hands. You can keep your legs straight and together or bend your knees.
- Hang with your arms fully extended, but keep a slight bend in the elbows to avoid joint lockout.
- Hold the hanging position for the desired time
- Lower your feet back to the ground.
Pull-Up

The pull-up is a classic bodyweight exercise that involves pulling your body upward to a bar until your chin clears it. It targets your pulling muscles, specifically the lats (the large back muscles crucial for pulling your body upward while climbing) and biceps (essential for pulling your body closer to the wall).
Climbers often need to generate a lot of upper-body force quickly, and pull-ups are particularly valuable because they involve several of the movements required in climbing and help develop the pulling power needed for dynamic moves like deadpoints or when reaching for far holds.
How to Do Pull-Ups
- Stand beneath a pull-up bar and reach up to grasp it with an overhand grip (palms facing away from you), slightly wider than shoulder-width apart. Ensure your grip is secure and comfortable.
- Hang freely from the bar, fully extending your arms. Your feet should be off the ground.
- Engage your core muscles by squeezing your abs and glutes.
- Inhale and initiate the movement by pulling yourself up towards the bar by bending your elbows and squeezing your shoulder blades together. Focus on using your back muscles rather than relying on your upper arms.
- Continue pulling yourself up until your chin reaches or clears the bar. Keep your torso upright and avoid excessive swinging or kicking with your legs.
- Slowly lower yourself back down to the starting position while maintaining control and stability, fully extending your arms.
- Repeat the movement for your desired number of repetitions.
Overhead Press

The overhead press, also known as the shoulder press, involves lifting a weight vertically above your head from shoulder level until your arms are fully extended. You can use different types of equipment for overhead presses, the most common being a barbell or a pair of dumbbells.
Overhead presses develop the shoulder strength you need to hold positions on the wall, pull through moves, and maintain control in dynamic climbing movements. They also improve the stability of the shoulder girdle, which helps prevent injuries during high-impact movements like dynos or when locking off on one arm.
The overhead press is more than a shoulder exercise; it also works the back of your arms, the triceps. While climbing, your triceps help when you need to press upward or push your body into a position and are often involved in pushing movements in overhangs or while mantling.
How to Do Overhead Barbell Presses
- Place a barbell in a rack at about chest height.
- Grip the bar slightly wider than shoulder-width apart and step close to it.
- Tighten your abs, unrack the bar and let it rest against your front delts while you step back from the rack. This is your starting position.
- Push the barbell up, extending your arms fully, while exhaling.
- Bring the weights back down to your shoulders, slow and controlled, while inhaling.
- Repeat the movement for the desired number of repetitions.
How to Do Overhead Dumbbell Presses
- Grab a pair of dumbbells, and lift them up to the starting position at your shoulders.
- Inhale and lightly brace your core.
- Press the dumbbells up to straight arms, while exhaling.
- Inhale at the top, or while lowering the dumbbells with control back to your shoulders.
- Repeat the movement for the desired number of repetitions.
Bulgarian Split Squat

The Bulgarian split squat is a lower-body exercise where you elevate one foot behind you on a bench or platform while the other remains on the floor. It works the quads, glutes, and adductors, strengthening the muscles you use to push off from footholds during ascents.
It’s a unilateral exercise, meaning each leg works independently. This helps even out any muscle imbalances you might have. It also provides an added challenge to balance and stability, which is crucial when standing on small footholds or performing dynamic moves in climbing.
In addition, the deep lunge position improves hip flexibility and mobility, which is important for high steps and moves requiring wide stances.
How to Do Bulgarian Split Squats
- Place a bar on your upper back or hold a pair of dumbbells in your hands.
- Stand with your back turned against a bench, which should be about knee height. Stand about one long step in front of the bench.
- Place your right foot on the bench behind you.
- Inhale, look forward, and squat down with control until right before your right knee touches the floor.
- Reverse the movement and extend your front leg again, while exhaling. Your back foot should only act as support.
- Repeat the movement for the desired number of repetitions, then switch side and repeat with your right leg forward and your left foot on the bench.
Hanging Leg Raise

The hanging leg raise is a great exercise for climbers because it develops core strength, hip flexor mobility, and control, all essential for executing powerful movements and maintaining body tension on the wall.
Hanging leg raises work the rectus abdominis (the “six-pack” muscles) and deep core muscles like the transverse abdominis. A strong core helps you stay balanced and stable, especially on overhangs or while performing dynamic movements.
They also develop the hip flexors, which are key for high steps, maintaining tight body positions, and efficiently executing moves like knee bars or heel hooks. You also practice bringing your legs to your chest, simulating high-step moves or flagging positions.
In addition, just by hanging there, you strengthen the shoulders, lats, and stabilizer muscles that keep you steady while hanging on holds during sustained climbs.
How to Do Hanging Leg Raises
- Grasp a pull-up bar with an overhand grip, shoulder-width apart.
- Hang from the bar with your arms fully extended and your body in a straight line from your head to your heels.
- Engage your core and keep your back straight.
- Raise your legs towards your chest, as high as you can, keeping your back straight and your core engaged.
- Slowly lower your legs back down to the starting position.
- Repeat the movement for your desired number of repetitions.
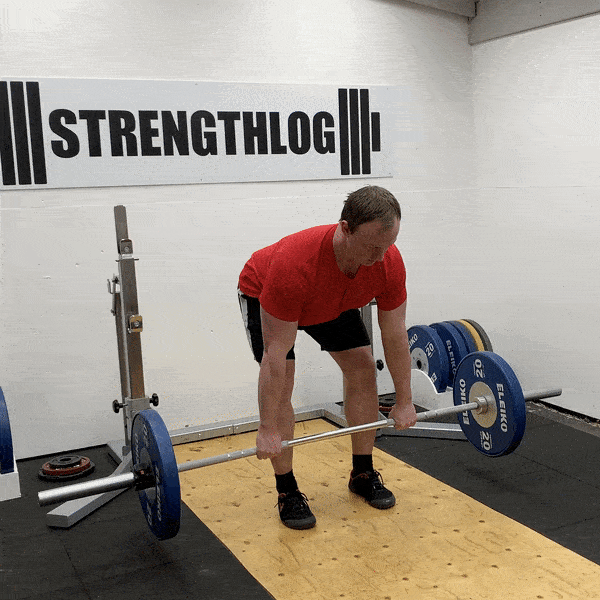
Deadlift

The deadlift is one of the best exercises to increase your strength from head to toe. They build raw power, which transfers directly to explosive moves in climbing. Whether you’re doing powerful dynos, high steps, or aggressive overhangs, deadlifts can help you generate the strength and power needed.
Climbing demands a strong core for body tension on the wall, and deadlifts hit your entire posterior chain—lower back, glutes, hamstrings, and core. You’ll feel more stable when making reachy moves or hanging on awkward angles.
Deadlifts strengthen the muscles around your spine and hips, reducing the risk of lower back injuries or tweaks during tough climbs. A strong back can be a lifesaver when you’re hanging onto tiny holds and twisting your body.
Lastly, as a climber, you know how important grip is. With deadlifts, you’ll be holding onto heavy weights, which helps build that iron-clad grip you need for crimps, slopers, and pinches.
How to Deadlift
- Stand with your feet hip-width apart, with your toes pointing slightly outward. The barbell should be over the middle of your feet, close to your shins.
- Bend at the hips and knees to reach the bar. Grip the barbell slightly wider than shoulder-width apart. You can use an overhand grip (both palms facing you) or a mixed grip (one palm facing you and the other facing away).
- Keep your back straight and chest up. Engage your core and ensure your shoulders are slightly in front of the bar. Your hips should be higher than your knees but lower than your shoulders.
- Pull the bar close to your body, with a straight back, until you are standing straight. Keep the bar close to your body, and your arms straight throughout the lift. The bar should travel in a straight line vertically.
- Reverse the motion by hinging at the hips and bending the knees. Lower the bar to the starting position in a controlled manner, maintaining a straight back.
- Reset your position if necessary.
- Repeat the movement for your desired number of repetitions.
Inverted Row

The inverted row is a bodyweight exercise that targets your lats, traps, rhomboids, rear delts, and biceps. These are essential muscles for pulling yourself up and staying on the wall.
While climbing is often a vertical pull (think pull-ups or lock-offs), the horizontal pulling motion of an inverted row complements it by developing your upper back strength and scapular control.
Scapular control is vital in climbing to prevent injuries from your shoulders down to your fingers. If your scapula lacks the strength to keep you stable, your arm muscles have to do more work than they should. The inverted row emphasizes pulling with your shoulder blades, teaching you to engage them properly—critical for maintaining strong, injury-resistant shoulders.
How to Do Inverted Rows
- Place a barbell in a rack, high enough for you to be able to hang below it in straight arms, with your heels on the floor. It you don’t have a bar, anything sturdy like a heavy table than won’t flip over will do.
- Grip the bar with an overhand grip, slightly wider than shoulder-width apart.
- Inhale, and pull yourself up as high as you can, or until your chest touches the bar.
- Exhale, while lowering yourself back to the starting position with control.
- Repeat the movement for the desired number of repetitions.
Dips

Bar dips are an excellent exercise for climbers, as they target the muscles crucial for pulling, pushing, and stabilizing movements on the wall: your chest, shoulders, and triceps.
Climbing isn’t all pulling, especially if you’re tackling overhangs or mantles. Dips build the pressing strength you need for moves like mantles and top-outs and for locking out your arms when you need to push yourself up or hold a position.
Dips also improve shoulder flexibility and range of motion, which is useful for reaching awkward holds and compressing your body against the wall.
How to Do Bar Dips
- Grip a dip station about shoulder-width apart, and climb or jump to get into the starting position.
- Lower yourself with control until your shoulder is below your elbow, or as deep as you comfortably can.
- Reverse the motion and return to the starting position.
- Repeat the movement for the desired number of repetitions.
Step-Up

Step-ups primarily target the quads, glutes, adductors, and hamstrings, all of which are crucial for explosive climbing moves, particularly when driving upwards from footholds, doing high-steps, or pushing your body weight from one hold to another.
Since climbing often requires you to rely on one leg for balance and propulsion, and because step-ups use one leg at a time, they are a great way to develop unilateral strength and improve stability in each leg individually. You improve your ability to push off from lower body holds and reduce reliance on pulling yourself up with your arms.
How to Do Step-Ups
- Stand in front of a bench, an elevated platform, or step. A step that is approximately knee height or slightly lower is appropriate for most people.
- Place your right foot on the step, ensuring your entire foot is in contact with the surface.
- Use the strength of your glutes and leg muscles to drive your body upward and lift your body upward onto the platform. Avoid using momentum or relying on your back foot to assist you. You want your glutes to do as much of the work as possible.
- Fully extend your right leg, straightening your knee and pushing your hip forward as you rise.
- Lift your back foot off the ground and bring it up onto the step, fully extending your leg.
- Lower yourself in a controlled motion. Maintain control throughout the descent and resist the downward movement with your glute and leg strength.
- Repeat the movement for your desired number of repetitions.
- Step onto the platform with your left foot and repeat the steps above for the opposite leg.
Plank

The plank is a hugely popular static ab exercise that is especially valuable to climbers.
When you’re hanging off a wall, your arms and legs are not the only muscles keeping you steady—your entire core works hard to keep your body balanced. The plank strengthens your abs and deep core muscles (transverse abdominis), which are key for maintaining body tension when you’re in awkward positions.
Holding a static plank also builds endurance, which translates to being able to hang on the wall longer without getting fatigued. You’ll also develop better control over your body, which helps you move efficiently between holds, especially on tricky climbs.
How to Plank
- Stand on your elbows and feet.
- Brace your abs and try to form and hold a straight line from your head to feet.
- Hold the position for the intended length of time or as long as you can.
Hollow Hold

The hollow hold is an isometric exercise that targets the core muscles, including the rectus abdominis (your “six-pack” muscles), obliques, and transverse abdominis (deep core stabilizers). It also engages the hip flexors to maintain a balanced position during the hold.
Climbers must stay tight in their midsection to transfer power between their upper and lower bodies. The hollow hold teaches you to brace your core effectively and improves the body tension required for advanced climbing techniques, like flagging or maintaining a straight arm position while reaching for holds.
How to Do Hollow Holds
- Start by lying down on your back with your legs straight and arms extended overhead on the floor. Press your lower back into the ground to engage your core.
- Lift your legs between 15 and 30 degrees off the ground, keeping them straight and close together. To make the exercise easier, you can bend your knees slightly and keep them closer to your chest.
- Simultaneously, lift your head and shoulders off the floor, ensuring your shoulder blades are just above the ground. Your arms should remain extended overhead in line with your body.
- Maintain tension in your core and keep your lower back pressed firmly into the floor. Your body should form a curved “hollow” shape, with only your lower back and glutes in contact with the floor.
- Breathe steadily and hold this position for the desired amount of time.
- Lower your legs, shoulders, and head back to the ground.
Front Squat

The front squat targets the quads, glutes, adductors, and lower back—muscles that are vital for many climbing movements, such as pushing through your legs or maintaining body tension on overhangs or during dynamic movements.
When you’re driving through your legs on steep routes or bouldering problems, your quads do much of the work. Compared to regular back squats, front squats shift the weight to the front, strengthening the muscles you need to power through explosive moves and stay stable during tricky foot placements. They also improve posture and shoulder stability, which helps during lock-offs and when pulling hard on slopers or undercling holds.
In addition, front squats encourage good ankle, hip, and thoracic spine mobility. Better hip mobility is helpful for improving your knee-to-elbow and drop-knee positions, while thoracic mobility helps you maintain balance when reaching for holds.
How to Front Squat
- Grip the bar slightly wider than shoulder-width. Step forward and place the bar on the front of your shoulders: on top of your clavicles, and tight against your throat.
- Inhale and brace your core slightly, and unrack the bar.
- Take two steps back, and adjust your foot position.
- Squat as deep as possible with good technique.
- With control, stop and reverse the movement, extending your hips and legs again.
- Repeat the movement for the desired number of repetitions.
Romanian Deadlift

The Romanian deadlift (RDL) is a fantastic exercise for climbers because it targets muscles essential for powerful, controlled climbing movements—particularly in the posterior chain (hamstrings, glutes, and lower back).
Strong hamstrings and glutes are essential for pushing off the wall, supporting your body during overhangs, and generating power from your legs to preserve grip strength. The RDL helps build that power in the back of your legs.
The RDL emphasizes a hip hinge pattern, which is crucial for maintaining good posture and body position during dynamic moves or transitions on the wall. It improves your ability to extend the hips, the secret sauce for explosive power moves.
In addition, it strengthens the muscles that keep your spine aligned and steady, which translates into better control on the wall, especially when you need to lock off or balance in precarious positions.
How to Do Romanian Deadlifts
- Get into the starting position by deadlifting a barbell off the floor or by unracking it from a barbell rack. Stand feet hip-width, inhale, and brace your core slightly.
- Lean forward by hinging in your hips. Keep your knees almost completely extended.
- Lean forward as far as possible with good form (no rounding your back). You don’t have to touch the barbell to the floor, although it is OK if you do.
- Reverse the movement and return to the standing position. Exhale on the way up.
- Repeat the movement for the desired number of repetitions.
Note: The dumbbell Romanian deadlift is a viable alternative to the barbell variant.
Hanging Knee Raise

The hanging knee raise is an easier variant of the hanging leg raise. In this program, you’ll switch to it during your deload weeks.
How to Perform Hanging Knee Raises
- Grasp a pull-up bar with an overhand grip, shoulder-width apart.
- Hang from the bar with your arms fully extended and your body in a straight line from your head to your heels.
- Engage your core and keep your back straight.
- Bend your knees and raise your legs towards your chest, as high as you can, keeping your back straight and your core engaged.
- Slowly lower your legs back down to the starting position.
- Repeat the movement for your desired number of repetitions.
L-Sit Hold

The L-sit hold is primarily an ab and hip flexor exercise, but it also works many other muscle groups climbers need for strength, endurance, and stability, such as the obliques, quads, chest, front delts, and triceps—all essential for tricky overhangs or maintaining tension on tiny holds.
Your core is your power center in climbing, and the L-sit hold engages it like few others. You build endurance in your abs and obliques, which is crucial for locking off moves and staying in control. It also strengthens your hip flexors, helping you lift your legs high to get a solid foot placement.
In addition, the L-sit teaches you to keep your body tight and controlled, translating directly to holding tension on the wall.
How to Do L-Sit Holds
- Sit on the floor with your legs extended straight in front of you.
- Place your hands on the floor beside your hips, with your fingers pointing forward or slightly outward. If available, you can use parallettes or push-up handles to make the movement more comfortable and provide more space for your legs.
- Tighten your core muscles and engage your quadriceps (front of your thighs) to help lift your legs.
- Push down through your hands to lift your hips off the ground.
- Keep your legs straight and extended in front of you, with your toes pointed, forming an “L” shape with your body. Your arms should remain straight and locked throughout the exercise, and your legs should be parallel to the ground or as high as possible without rounding your back or losing form.
- Hold the L-sit for the desired amount of time.
- Lower your body back to the floor.
Bench Press

The bench press is often called the king of upper body exercises, and while that claim doesn’t hold true for climbers, it can still be an ally in your climbing game.
Bench presses work your pushing muscles (chest, front delts, and triceps), and although climbers are more focused on pulling, sometimes you need to press yourself out of tight situations—like when you’re mantling over a ledge or pressing into a corner. Strong pushing muscles will make those transitions smoother.
Climbers are notorious for overdeveloping their pulling muscles (lats, biceps, traps) and underworking their pushing muscles. Such an imbalance can lead to shoulder problems, so the bench press helps strengthen the opposing muscles, keeping your body more balanced and resistant to injuries.
How to Bench Press
- Lie on the bench, pull your shoulder blades together and down, and slightly arch your back.
- Grip the bar slightly wider than shoulder-width apart.
- Inhale, hold your breath, and unrack the bar.
- Lower the bar with control, until it touches your chest somewhere close to your sternum.
- Push the bar up to the starting position while exhaling.
- Take another breath while in the top position, and repeat the movement for your desired number of repetitions.
Dumbbell Row

The dumbbell row is an excellent exercise for the latissimus dorsi (lats), rhomboids, trapezius, rear delts, and biceps. It gives you the pulling power to scale walls like Spider-Man (minus the sticky fingers, of course).
Dumbbell rows mimic the pulling motion you use when climbing, particularly for overhangs and vertical ascents where you rely on upper-body strength to pull yourself upward. It helps improve your ability to hold onto holds for longer and move more powerfully between them.
How to Do Dumbbell Rows
- Place a dumbbell on the floor beside a bench or some other sturdy object. Stand facing the bench and place your left hand and left knee on top of it.
- Grip the dumbbell with your right hand. Bend your knees slightly and hinge forward at the hips, keeping your back flat and your torso roughly parallel to the floor.
- Engage your core muscles to stabilize your torso throughout the movement.
- While maintaining the position of your upper body and keeping your elbow close to your side, inhale and pull the dumbbell up towards your torso by retracting your shoulder blade. Focus on squeezing your back muscles as you lift.
- Continue pulling the dumbbell until it reaches the side of your torso. Row it closer to your hips to target your lower lats. Squeeze your lats at the top of the movement, ensuring a strong contraction in your back muscles.
- Lower the dumbbell back to the starting position while exhaling, maintaining control and good form throughout the descent.
- Repeat the movement for your desired number of repetitions, switch sides, and perform the above steps rowing with your left arm.
Walking Lunge

The walking lunge is an excellent exercise for climbers because it strengthens the entire lower body and improves balance and mobility, which are key to climbing performance.
Walking lunges target the quadriceps, adductors, and glutes. These muscles are essential for generating power in your legs, which helps you push off footholds efficiently, especially when you transition from one hold to another or need to mantle over ledges. You maintain stability and push off holds more explosively, saving upper body energy.
Climbing requires hip flexibility and mobility for high steps, stemming, or drop knees. Walking lunges are fantastic for hip mobility if you do them with a full range of motion, allowing you to reach higher footholds and maintain balance on awkward or overhanging climbs.
How to Do Walking Lunges
- Stand with your feet at shoulder-width apart, with a slight bend in the knees. Make sure that your core is engaged.
- Step forward with one of your legs, bending both knees at the same time. Stop the movement just before the back knee touches the floor, you should have about a 90-degree angle in both knees.
- Drive through your front foot and extend the knee until you get back to a standing position.
- Continue by repeating the movement on the other side.
- Repeat the movement for your desired number of repetitions.
Medicine Ball Slam

The ball slam is a powerful full-body exercise that can be highly beneficial for climbers due to the explosive power and core stability it develops. It works your entire body—arms, shoulders, core, and legs—building explosive strength, which you need to make dynamic climbing moves like dynos or fast, powerful reaches.
When performing ball slams, your entire core engages to stabilize the body during the overhead lift and downward slam, improving your body control on the wall and your ability to maintain balance during complex climbing sequences. It also boosts the full-body coordination you need when moving through sequences that require both upper and lower body engagement.
Try alternating slams between the right and left sides to make ball slams more specific for climbing. It will help with the twisting and turning your body needs to stay balanced on tricky routes.
How to Ball Slam
- Stand with your feet about shoulder-width apart, your knees and hips slightly bent, holding the ball in both hands at chest height. Engage your core, and keep a good posture.
- Extend your knees and drive your hips forward while simultaneously lifting the ball. Aim for being as tall as possible, the ball overhead, arms up, hips slightly forward, and on your toes from the force of your drive.
- Use your core and arms to slam the medicine ball straight down between your feet with as much force as possible. Press your hips back and bend your knees to further power the slam. Exhale as you slam the ball down.
- Squat down to pick up the ball from the floor, then immediately move into the next slam by repeating the movement.
- Repeat the movement for your desired number of repetitions or for the intended length of time.
Trap Bar Deadlift

The trap bar deadlift, performed with a hex-shaped bar, offers the same benefits and trains the same muscles as the regular barbell deadlift but places you in a more upright position.
Trap bar deadlifts are easier on the spine and can be better for people with mobility issues or injury concerns. In addition, they hit the quads harder and allow for heavier lifts.
Try to explode the bar from the floor as quickly as you can (without sacrificing form, of course).
How to Do Trap Bar Deadlifts
- Step into the bar’s opening, and position yourself so that the handles are in line with the middle of your feet.
- Inhale, bend down and grip the handles.
- Hold your breath, brace your core slightly, and lift the bar.
- Lift the bar with a straight back, until you are standing straight.
- Lower the bar back to the ground with control.
- Take another breath, and repeat the movement for your desired number of repetitions.
Box Jump

The box jump can be a valuable addition to a climber’s strength training routine because they are fantastic for explosive power, lower body strength, and coordination, all of which are important for dynamic climbing movements.
Box jumps work almost every muscle in the lower body, including the quads, glutes, adductors, abductors, hamstrings, and calves.
They primarily target the fast-twitch muscle fibers that are responsibe for generating explosive power, which is very useful in climbing, especially for dynamic movements like dynos or explosive moves to higher holds as they improve your ability to create upward momentum with your legs.
How to Do Box Jumps
- Select a box that is appropriate for your fitness level and jumping ability.
- Stand with your feet shoulder-width apart, a few inches away from the box. Your knees should be slightly bent, and your hips pushed back in an athletic stance, like a mini squat.
- Engage your core and swing your arms back to generate momentum. Keep your chest up, and your weight balanced evenly across your feet.
- Push through the balls of your feet, extending your hips, knees, and ankles as you jump up. Swing your arms forward and upward to help propel yourself onto the box. Jump with both feet leaving the ground at the same time.
- As you land on the box, aim to have both feet hit the surface at the same time. Bend your knees slightly to absorb the impact, keeping your chest up and back straight.
- Once you’ve landed on the box, stand up tall, extending your hips completely to finish the jump.
- Step off the box one foot at a time, and reset your stance before attempting the next jump.
- Repeat the movement for your desired number of jumps.
Kettlebell Swing

The kettlebell swing is a dynamic exercise that develops power in the hips, glutes, and posterior chain. For a climber, it translates into powerful leg drives and body stability, where explosive hip movement is often needed to push off holds or perform dynamic movements.
Kettlebell swings improve muscle endurance, which is essential during long climbing sessions. Because climbing often involves repetitive movements, increasing your stamina in the glutes, hamstrings, and lower back can help you last longer on the wall.
In addition, kettlebell swings are great for hip mobility, which is awesome when you need to perform moves that require high steps or deep drop-knees.
How to Do Kettlebell Swings
- Place a kettlebell on the ground, about one or two feet in front of you.
- Take a wide stance, lean forward, and grip the kettlebell.
- Brace your core slightly, and swing the kettlebell back between your legs while inhaling.
- Swing the kettlebell forward by extending your hip while exhaling.
- Try to swing the kettlebell to about chest height.
- Repeat for the desired number of reps and put the kettlebell back on the ground when you’re finished.
Push Press

The push press works the upper body like the regular barbell overhead press but incorporates a dynamic movement with a slight dip and drive from the legs, making it a great way to develop explosive power.
You gain strength that allows you to maintain control in overhead positions, particularly on overhanging routes or during reach-intensive moves. The push press also teaches you to integrate lower-body power with upper-body movement, which means better leg engagement on the wall during climbing sequences.
How to Push Press
- Clean a bar to your shoulders, or lift it out from a rack.
- Let the bar rest against the front of your shoulders, with your grip slightly outside your shoulders.
- Inhale and lightly brace your core.
- Bend your knees, and then forcefully push yourself and the bar upwards using your legs.
- When your legs are extended, immediately start pressing the bar with your arms, until your arms are fully extended.
- With control, lower the bar back to your shoulders.
- Repeat the movement for your desired number of jumps.
Barbell Row
The barbell row are an excellent exercise for climbers because they target many of the muscles that are essential for climbing performance.
They primarily work the muscles of the upper back (rhomboids, traps, lats, and rear delts), which are critical for pulling movements in climbing. Stronger lats and rhomboids improve your ability to draw your body toward the wall efficiently.
Pull the barbell towards your torso as fast as you can in an explosive manner (while maintaining form), then resist and control the descent.
How to Do Barbell Rows
- Grasp the barbell with an overhand grip, slightly wider than shoulder-width apart.
- Stand with your feet slightly wider than feet hip-width apart, bend your knees slightly, and hinge forward at your hips, maintaining a neutral spine curve.
- Brace your core and keep your back straight. Inhale and pull the barbell towards your lower chest or upper abdomen, keeping your elbows close to your body. Squeeze your shoulder blades together at the top of the movement.
- Lower the barbell back to the starting position in a controlled manner.
- Repeat the movement for the desired number of repetitions.
Strength Training for Climbers: Final Words
You have reached the end of Strength Training for Climbers. Thank you for reading! I hope you have enjoyed the read and learned things that will benefit your climbing.
To follow the Strength Training for Climbers training program, download our workout log app and start tracking your workouts today:
Here’s a summary of the benefits of strength training for climbers:
- Stronger muscles help you generate more force on holds and during movements.
- Strength training gives you a more powerful grip, making it easier to hold onto challenging grips for longer.
- Building strength in key areas like your shoulders, back, and fingers reduces the risk of common climbing injuries.
- Stronger muscles can handle more strain, helping you climb longer without tiring out.
- A stronger body means greater stability and balance, allowing for more controlled and efficient climbing movements.
In short, strength training is a crucial component of becoming a stronger, more efficient climber and will boost your performance on the wall or rock. Whether you’re aiming to tackle harder routes or simply climb with more confidence, adding strength training to your routine will set you up for continued growth and success with a body that can handle the demands of climbing.
References
- Sports Med Open. 2024 Jan 19;10(1):10. The Connection Between Resistance Training, Climbing Performance, and Injury Prevention.
- Br J Sports Med. 2014 Jun;48(11):871-7. The effectiveness of exercise interventions to prevent sports injuries: a systematic review and meta-analysis of randomised controlled trials.
- Sports Med. 1986 Jan-Feb;3(1):61-8. Value of resistance training for the reduction of sports injuries.
- Eur J Sport Sci. 2017 May;17(4):378-385. The effects of high resistance-few repetitions and low resistance-high repetitions resistance training on climbing performance.